Triggering Job
Qualiz offers two primary methods to trigger your workflows:
- Manual / Ad-hoc Triggering
- Scheduled Triggering
Let's explore each method in detail
Manual / Ad-hoc Triggering
Manual triggering allows you to run jobs on-demand whenever needed, without waiting for scheduled times. This is particularly useful for testing new workflows, running one-time data processes, or handling urgent requests.
How to Trigger a Job Manually:
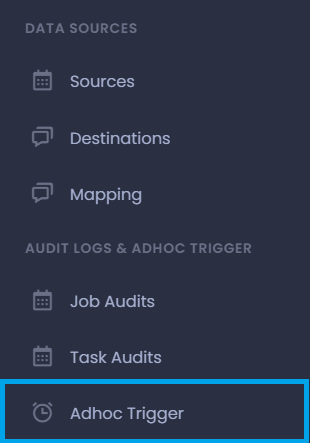
- Navigate to the Adhoc Trigger section
- Click on the "Adhoc Trigger" menu option located under "Audit Logs & Adhoc Trigger" in the side navigation menu
- Access the Ad-hoc Trigger screen
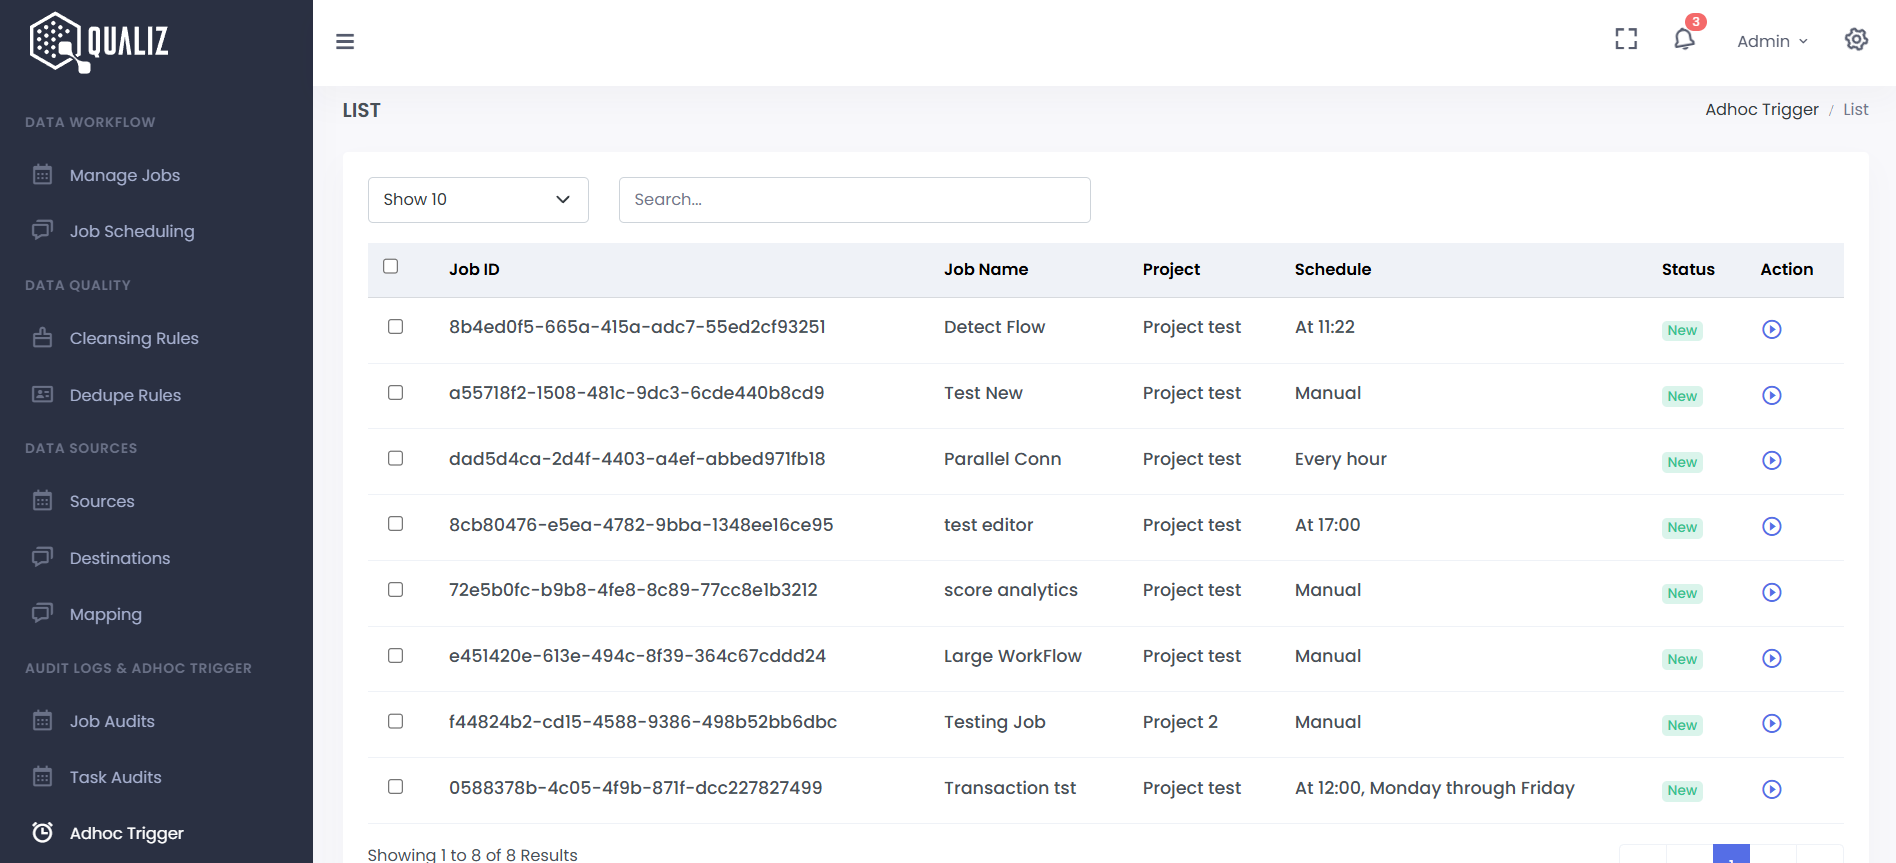
- The system will navigate you to the Ad-hoc Trigger screen
- This screen displays a comprehensive list of all available jobs in your system
- Jobs are typically organized by project and include status indicators
- Find your job
- Locate the specific job you want to run in the list
- You can use the search functionality if you have numerous jobs
- Trigger the job
- Click on the button next to the job you want to run
Scheduled Triggering
Scheduled triggering automates job execution based on specified time intervals, which is essential for regular data processing pipelines, automated reporting, and data synchronization at specific times.
How to Set Up a Scheduled Trigger:
- Navigate to Job Scheduling
- Click on the "Job Scheduling" menu option under "Data Workflows" in the side navigation menu
- Access the Job Scheduling screen
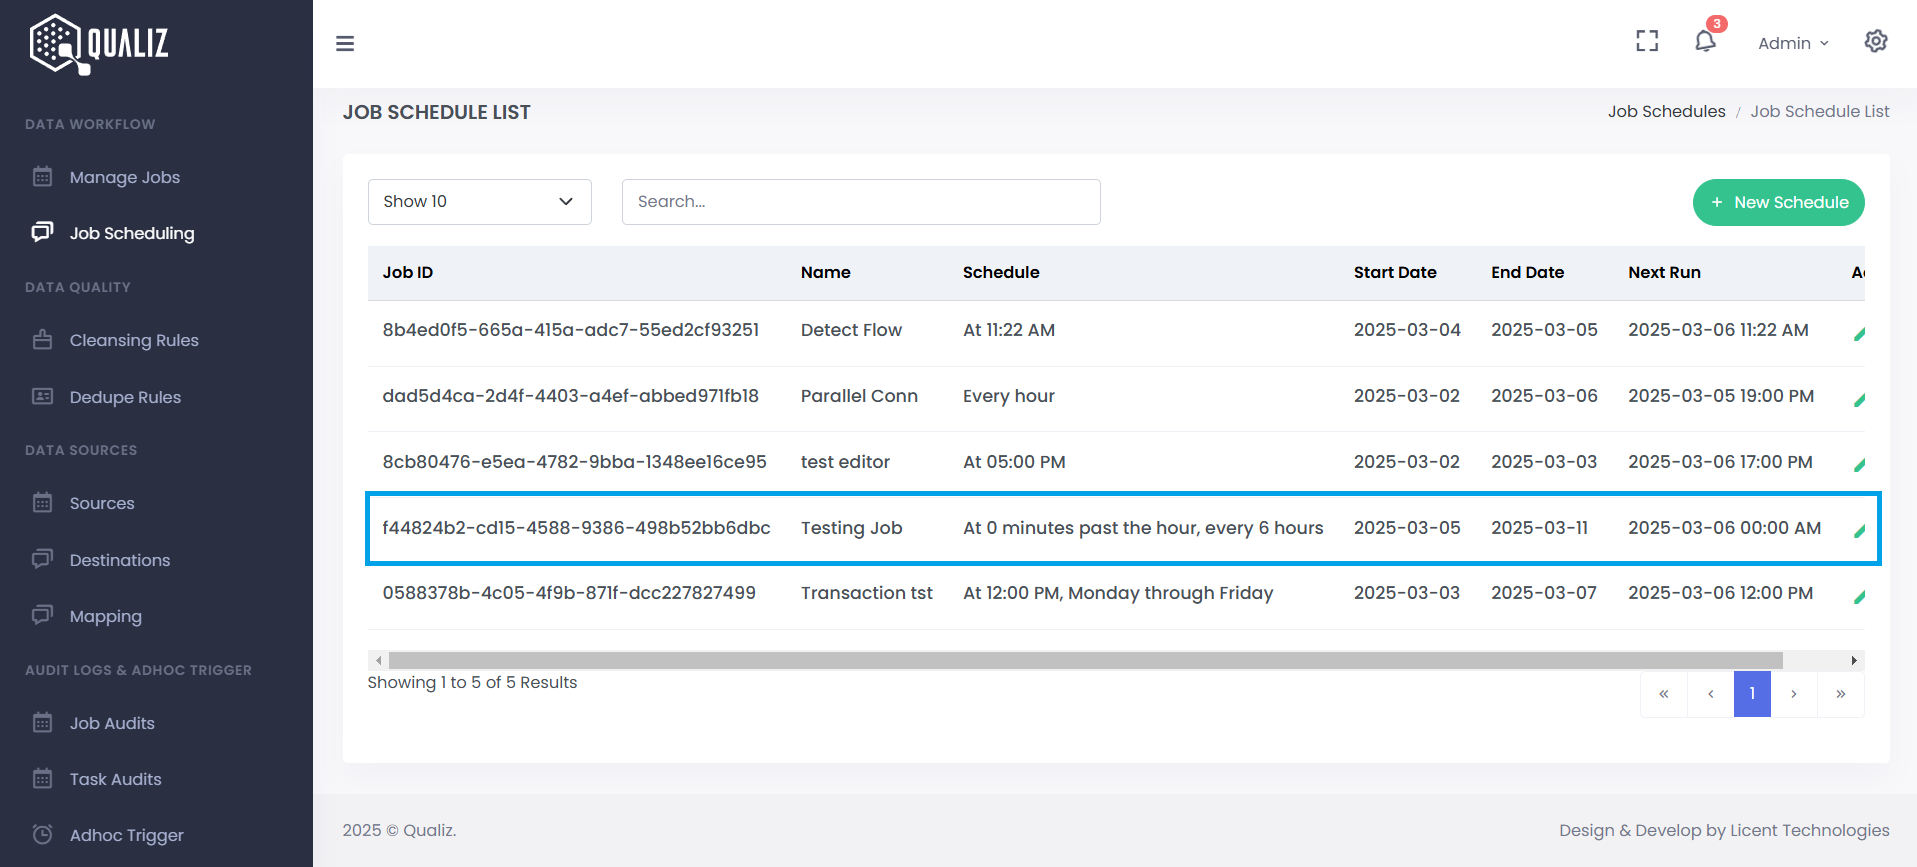
- You will navigate to the Job Scheduling screen
- This screen displays all existing schedules and allows you to create new ones
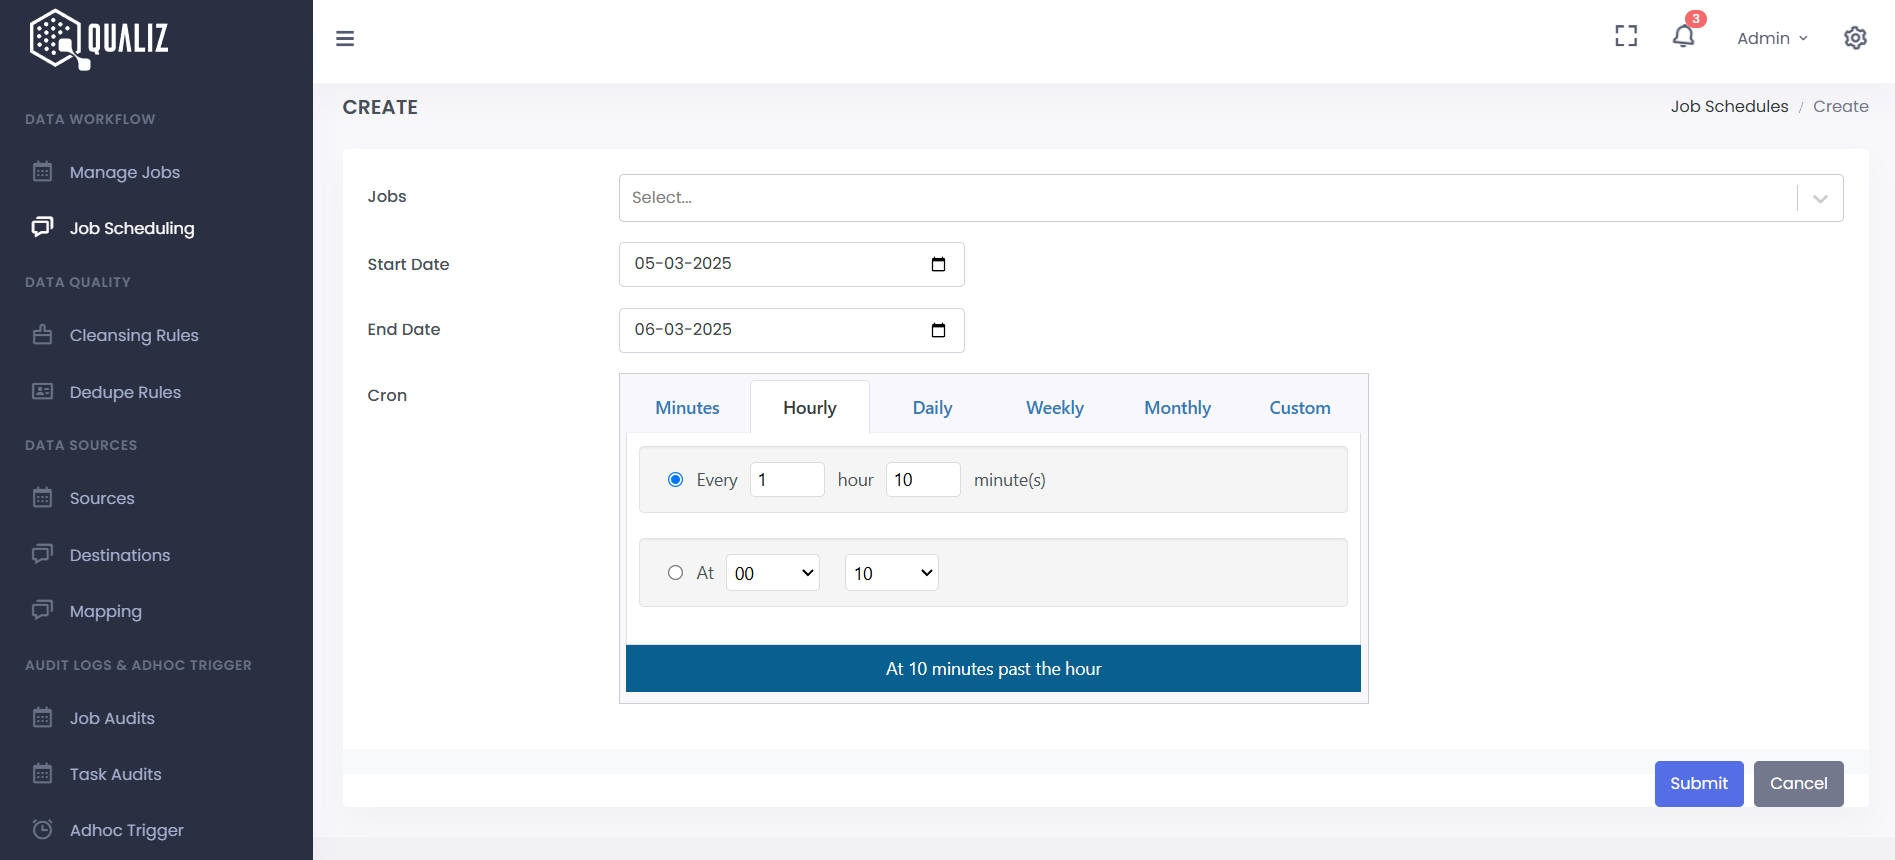
- Create a new schedule
- Click the "New Schedule" button located in the top right corner of the screen
- This opens the schedule creation screen
- Configure schedule details
- Job Selection: Select the specific job(s) you want to schedule from the dropdown list
- Start Date/Time: Set the exact date and time when the schedule should begin
- End Date/Time: Set the exact date and time when the schedule should end
- Cron: Set how often the job should run (hourly, daily, weekly, monthly)
- Save the schedule
- Click the "Submit" button to create your schedule
- Once saved, the schedule becomes active and will automatically trigger the job at the specified times